BenchmarkXPRT Blog banner

Tag Archives: MXNet

Understanding AIXPRT’s default number of requests

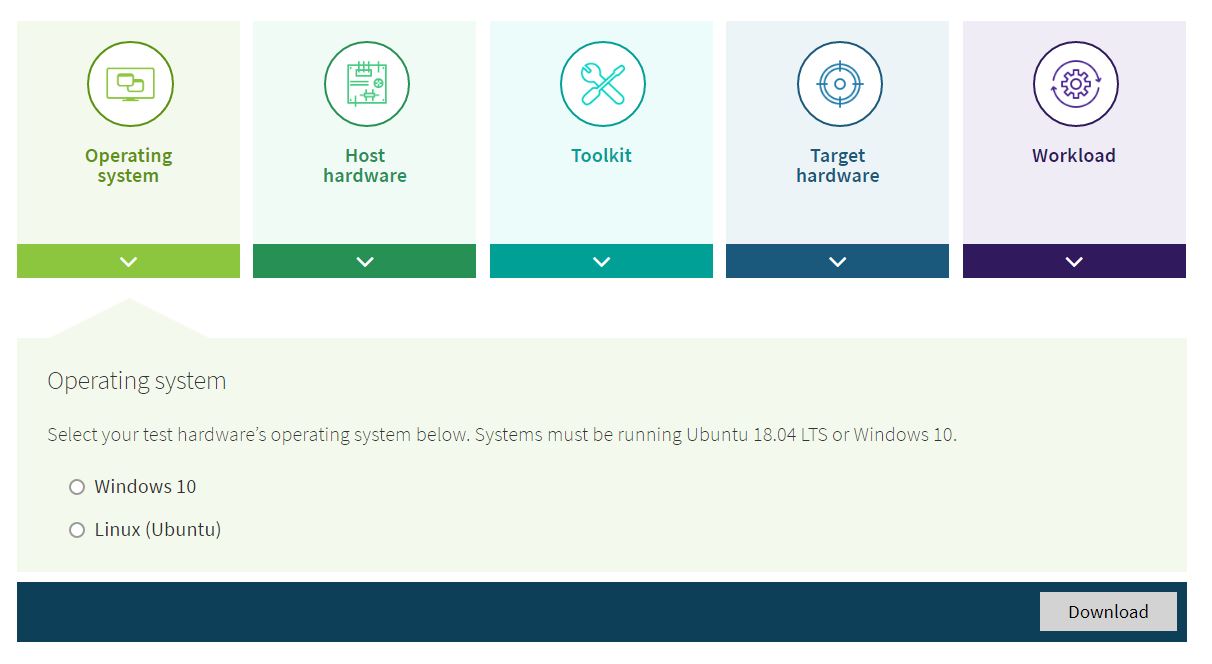
A few weeks ago, we discussed how AIXPRT testers can adjust the key variables of batch size, levels of precision, and number of concurrent instances by editing the JSON test configuration file in the AIXPRT/Config directory. In addition to those key variables, there is another variable in the config file called “total_requests” that has a different default setting depending on the AIXPRT test package you choose. This setting can significantly affect a test run, so it’s important for testers to know how it works.

The total_requests variable specifies how many inference requests AIXPRT will send to a network (e.g., ResNet-50) during one test iteration at a given batch size (e.g., Batch 1, 2, 4, etc.). This simulates the inference demand that the end users place on the system. Because we designed AIXPRT to run on different types of hardware, it makes sense to set the default number of requests for each test package to suit the most likely hardware environment for that package.

For example, testing with OpenVINO on Windows aligns more closely with a consumer (i.e., desktop or laptop) scenario than testing with OpenVINO on Ubuntu, which is more typical of server/datacenter testing. Desktop testers require a much lower inference demand than server testers, so the default total_requests settings for the two packages reflect that. The default for the OpenVINO/Windows package is 500, while the default for the OpenVINO/Ubuntu package is 5,000.

Also, setting the number of requests so low that a system finishes each workload in less than 1 second can produce high run-to-run variation, so our default settings represent a lower boundary that will work well for common test scenarios.

Below, we provide the current default total_requests setting for each AIXPRT test package:

  • MXNet: 1,000
  • OpenVINO Ubuntu: 5,000
  • OpenVINO Windows: 500
  • TensorFlow Ubuntu: 100
  • TensorFlow Windows: 10
  • TensorRT Ubuntu: 5,000
  • TensorRT Windows: 500


Testers can adjust these variables in the config file according to their own needs. Finding the optimal combination of machine learning variables for each scenario is often a matter of trial and error, and the default settings represent what we think is a reasonable starting point for each test package.

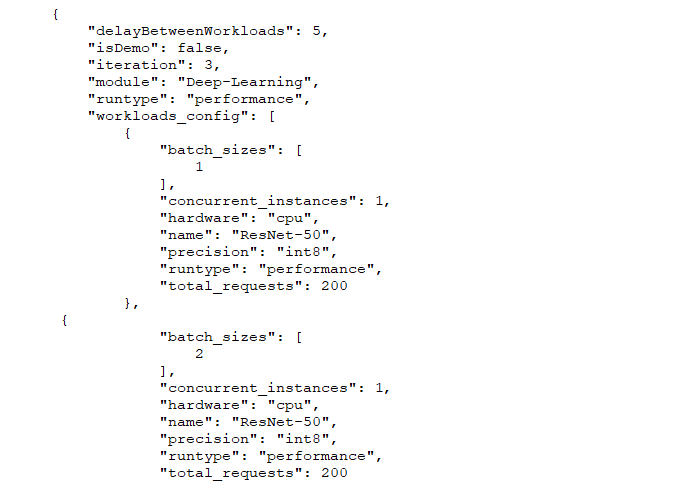
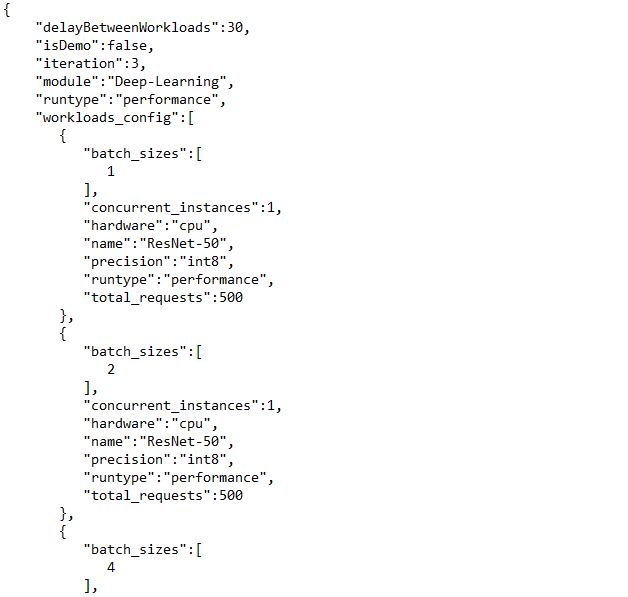
To adjust the total_requests setting, start by locating and opening the JSON test configuration file in the AIXPRT/Config directory. Below, we show a section of the default config file (CPU_INT8.json) for the OpenVINO-Windows test package (AIXPRT_1.0_OpenVINO_Windows.zip). For each batch size, the total_requests setting appears at the bottom of the list of configurable variables. In this case, the default setting Is 500. Change the total_requests numerical value for each batch size in the config file, save your changes, and close the file.

Total requests snip

Note that if you are running multiple concurrent instances, OpenVINO and TensorRT automatically distribute the number of requests among the instances. MXNet and TensorFlow users must manually allocate the instances in the config file. You can find an example of how to structure manual allocation here. We hope to make this process automatic for all toolkits in a future update.

We hope this information helps you understand the total_requests setting, and why the default values differ from one test package to another. If you have any questions or comments about this or other aspects of AIXPRT, please let us know.

Justin

AIXPRT is here!

We’re happy to announce that AIXPRT is now available to the public! AIXPRT includes support for the Intel OpenVINO, TensorFlow, and NVIDIA TensorRT toolkits to run image-classification and object-detection workloads with the ResNet-50 and SSD-MobileNet v1networks, as well as a Wide and Deep recommender system workload with the Apache MXNet toolkit. The test reports FP32, FP16, and INT8 levels of precision.

To access AIXPRT, visit the AIXPRT download page. There, a download table displays the AIXPRT test packages. Locate the operating system and toolkit you wish to test and click the corresponding Download link. For detailed installation instructions and information on hardware and software requirements for each package, click the package’s Readme link. If you’re not sure which AIXPRT package to choose, the AIXPRT package selector tool will help to guide you through the selection process.

In addition, the Helpful Info box on AIXPRT.com contains links to a repository of AIXPRT resources, as well links to XPRT blog discussions about key AIXPRT test configuration settings such as batch size and precision.

We hope AIXPRT will prove to be a valuable tool for you, and we’re thankful for all the input we received during the preview period! If you have any questions about AIXPRT, please let us know.

Coming soon: An interactive AIXPRT selector tool

AI workloads are now relevant to all types of hardware, from servers to laptops to IOT devices, so we intentionally designed AIXPRT to support a wide range of potential hardware, toolkit, and workload configurations. This approach provides AIXPRT testers with a tool that is flexible enough to adapt to a variety of environments. The downside is that the number of options makes it fairly complicated to figure out which AIXPRT download package suits your needs.

To help testers navigate this complexity, we’ve been working on a new interactive selector tool. The tool is not yet live, but the screenshots and descriptions below provide a preview of what’s to come.

The tool will include drop-down menus for the key factors that go into determining the correct AIXPRT download package, along with a description of the options. Users can proceed in any order but will need to make a selection for each category. Since not all combinations work together, each selection the user makes will eliminate some of the options in the remaining categories.

AIXPRT user guide snip 1

After a user selects an option, a check mark appears on the category icon, and the selection for that category appears in the category box (e.g., TensorFlow in the Toolkit category). This shows users which categories they’ve completed and the selections they’ve made. After a user selects options in more than one category, a Start over button appears in the lower-left corner. Clicking this button clears all existing selections and provides users with a clean slate.

Once every category is complete, a Download button appears in the lower-right corner. When you click this, a popup appears that provides a link for the correct download package and associated readme file.

AIXPRT user guide snip 2

We hope the selector tool will help make the AIXPRT download and installation process easier for those who are unfamiliar with the benchmark. Testers who already know exactly which package they need will be able to bypass the tool and go directly to a download table.

The tool will debut with the AIXPRT 1.0 GA in the next few days, and we’ll let everyone know when that happens! If you have any questions or comments about AIXPRT, please let us know.

Justin

AIXPRT Community Preview 3 is here!

We’re happy to announce that the AIXPRT Community Preview 3 (CP3) is now available! As we discussed in last week’s blog, testers can expect three significant changes in AIXPRT CP3:

  • We updated support for the Ubuntu test packages from Ubuntu version 16.04 LTS to version 18.04 LTS.
  • We added TensorRT test packages for Windows and Ubuntu. Previously, AIXPRT testers could test only the TensorFlow variant of TensorRT. Now, they can use TensorRT to test systems with NVIDIA GPUs.
  • We added the Wide and Deep recommender system workload with the MXNet toolkit for Ubuntu systems.


To access AIXPRT CP3, click this access link and submit the brief information form unless you’ve already done so for CP2. You will then gain access to the AIXPRT community preview page. (If you’re not already a BenchmarkXPRT Development Community member, we’ll contact you with more information about your membership.)

On the community preview page, a download table displays the currently available AIXPRT CP3 test packages. Locate the operating system and toolkit you wish to test, and click the corresponding Download link. For detailed installation instructions and information on hardware and software requirements for each package, click the corresponding Readme link. Instead of providing installation guide PDFs as we did for CP2, we are now directing testers to a public GitHub repository. The repository contains the installation readmes for all the test packages, as well as a selection of alternative test configuration files. We’ll discuss the alternative configuration files in more detail in a future blog post.

Note: Those who have access to the existing AIXPRT GitHub repository will be able to access CP3 in the same way as previous versions.

We’ll continue to keep everyone up to date with AIXPRT news here in the blog. If you have any questions or comments, please let us know.

Justin

Understanding concurrent instances in AIXPRT

Over the past few weeks, we’ve discussed several of the key configuration variables in AIXPRT, such as batch size and level of precision. Today, we’re discussing another key variable: number of concurrent instances. In the context of machine learning inference, this refers to how many instances of the network model (ResNet-50, SSD-MobileNet, etc.) the benchmark runs simultaneously.

By default, the toolkits in AIXPRT run one instance at a time and distribute the compute load according to the characteristics of the CPU or GPU under test, as well as any relevant optimizations or accelerators in the toolkit’s reference library. By setting the number of concurrent instances to a number greater than one, a tester can use multiple CPUs or GPUs to run multiple instances of a model at the same time, usually to increase throughput.

With multiple concurrent instances, a tester can leverage additional compute resources to potentially achieve higher throughput without sacrificing latency goals.

In the current version of AIXPRT, testers can run multiple concurrent instances in the OpenVINO, TensorFlow, and TensorRT toolkits. When AIXPRT Community Preview 3 becomes available, this option will extend to the MXNet toolkit. OpenVINO and TensorRT automatically allocate hardware for each instance and don’t let users make manual adjustments. TensorFlow and MXNet require users to manually bind instances to specific hardware. (Manual hardware allocation for multiple instances is more complicated than we can cover today, so we may devote a future blog entry to that topic.)

Setting the number of concurrent instances in AIXPRT

The screenshot below shows part of a sample config file (the same one we used when we discussed batch size and precision). The value in the “concurrent instances” row indicates how many concurrent instances will be operating during the test. In this example, the number is one. To change that value, a tester simply replaces it with the desired number and saves the changes.

Config_snip

If you have any questions or comments (about concurrent instances or anything else), please feel free to contact us.

Justin

Check out the other XPRTs:

Forgot your password?